For New Bedford, Massachusetts homeowners looking to enhance their outdoor spaces, installing a fence offers both privacy and security. This comprehensive guide navigates the DIY fence installation process, from initial planning to final touches. We’ll walk you through assessing your property, selecting the perfect style and material, strategically placing posts, assembling the fence, securing gates and panels, and incorporating safety measures. Get ready to transform your backyard into a well-defined oasis!
- Planning Your Fence: Permits & Property Assessment
- Choosing the Right Fence Style & Material
- Digging & Marking Post Locations Strategically
- Assembling & Installing Fence Posts and Rails
- Securing Gates & Panels: Final Touches & Safety Tips
Planning Your Fence: Permits & Property Assessment
Before beginning your DIY fence installation project, it’s crucial to plan ahead, especially in New Bedford, Massachusetts where permits and property assessments play a significant role. Homeowners should start by assessing their property lines and ensuring they understand local regulations regarding fence placement and materials. Checking with the city or town clerk’s office for any necessary building permits is an essential step to avoid legal issues and potential fines.
Taking measurements of your desired fence location, considering factors like surrounding plants, structures, and topography, will help you design a fence that fits seamlessly into your landscape. Additionally, evaluating the different types of fences suitable for your property’s needs and aesthetic preferences—from wood and vinyl to chain link or iron—will ensure you select the best option for both functionality and longevity.
Choosing the Right Fence Style & Material
When considering DIY fence installation, New Bedford homeowners should start by selecting a style and material that aligns with their property’s aesthetic and practical needs. Fences come in various types, from traditional wood picket fences to sleek metal designs or even vibrant vinyl options. Each material has its advantages; for instance, wood offers classic charm but requires regular maintenance, while vinyl is low-maintenance and comes in diverse colors.
The ideal fence style should complement your home’s architecture and the surrounding landscape. For a charming, rustic look, consider a wooden fence with a natural finish. If privacy is a priority, opt for a solid fence or a tall, dense hedge. Modern homeowners might prefer sleek, minimalist metal fences or colorful vinyl panels that require little upkeep.
Digging & Marking Post Locations Strategically
When planning your DIY fence installation, one of the most crucial steps is digging and marking post locations strategically. Start by measuring and marking where each post will go along the perimeter of your property. Use string or chalk to create a straight line that outlines the desired fence route. Then, locate and mark the exact spots for posts, ensuring they align with your measurements and the natural terrain of your yard. Digging holes at these locations is essential to provide stable support for your fence. Consider soil conditions and the type of fence you’re installing; some materials require deeper or wider holes for optimal stability.
Assembling & Installing Fence Posts and Rails
When assembling and installing fence posts and rails, start by marking out the perimeter of your desired fence line using stakes and string. This ensures a straight and consistent barrier. Dig holes for each post, making sure they are deep enough to provide stability. Place the posts in the holes and use concrete to secure them firmly in place. Allow the concrete to set completely before proceeding.
Once the posts are stable, attach the horizontal rails using nails or screws. Ensure the rails are level and secure, providing a solid foundation for your fence panels. Install the fence panels by attaching them to both the vertical posts and horizontal rails using appropriate fasteners. Regularly check for level and adjust as needed throughout the process for a neat, even finish.
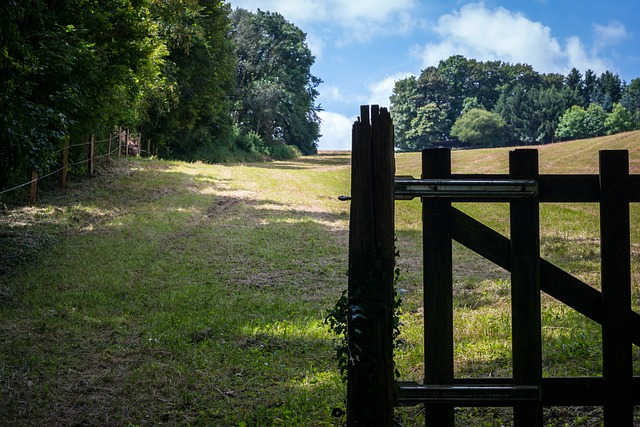
Securing Gates & Panels: Final Touches & Safety Tips
When installing a fence, paying special attention to gates and panels is crucial for both functionality and safety. Once your fence panels are securely fastened, it’s time to focus on gates. Make sure gates swing freely and open smoothly by adjusting hinges as needed. Install a durable latch or lock to keep the gate closed, ensuring privacy and security. Regularly inspect these mechanisms for any wear and tear, tightening screws and replacing parts as necessary.
Beyond functionality, consider safety features. Ensure gates are fitted with visible, clearly marked handles and that the latch mechanism is easy to operate for all users, including children and elderly family members. Additionally, check local regulations regarding fence heights and gate openings, especially around driveways or entryways, to guarantee compliance.